First Print
Find the microSD card supplied (it’s in the box, fitted into a USB adapter) and slide it into the slot on the right-side front of the base. Hit the “Print” button from the main menu and then be disappointed that you can’t see anything.
For some reason the CR10S-Pro can only read files at the root of the SD card and the one in my kit had no (readable) files on the root, only folders. So I had to go to my office and use my PC to move the “test-dog” gcode file to the root. The SD card in my case had all the folders labelled in Chinese, but one of them is in English inside the first level folder.
Back down to the kitchen, insert the card, hit print, choose the file and hit the go button and the machine started up. I instantly saw that the bed was set to 0C. While some people claim PLA doesn’t need a heated bed, I’ve always printed using a temperature around 40C-50C, and especially in my cold kitchen not heating the bed seemed like a possible problem. Once the nozzle reached temperature the print began with 10 (yes 10, count them) skirts, which seems like overkill, but also skirts that were clearly nowhere close to sticking to the bed. Stop.
Back upstairs, into Simplify3D, and I amended a simple CR10S profile, added a negative z of 0.1mm, set the bed to 45C and left everything else as is. I chose the wonderful horse model by fantasygraph as I’d been waiting for an opportunity to print it for weeks (too busy) and it seemed like a good test. I scaled it down a little to bring the print time into line with the local pub opening, saved it to the SD card, down to the kitchen, into the machine and print.
When the first layer was in progress it looked a lot like the nozzle was still too high and that possibly it was under-extruding (Simplify was set to 90%) but luckily I got distracted by a phone call and let the print run. When I came back a few layers later it all looked good and there were no signs of lifting from the bed, so I let it carry on. Four hours later, this was the result:
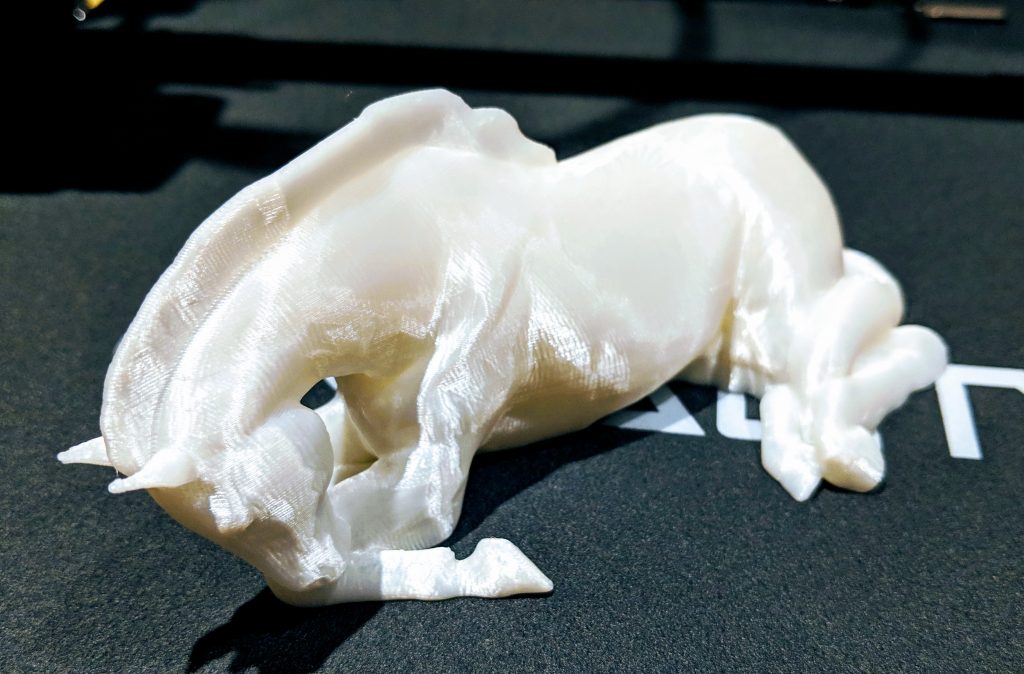
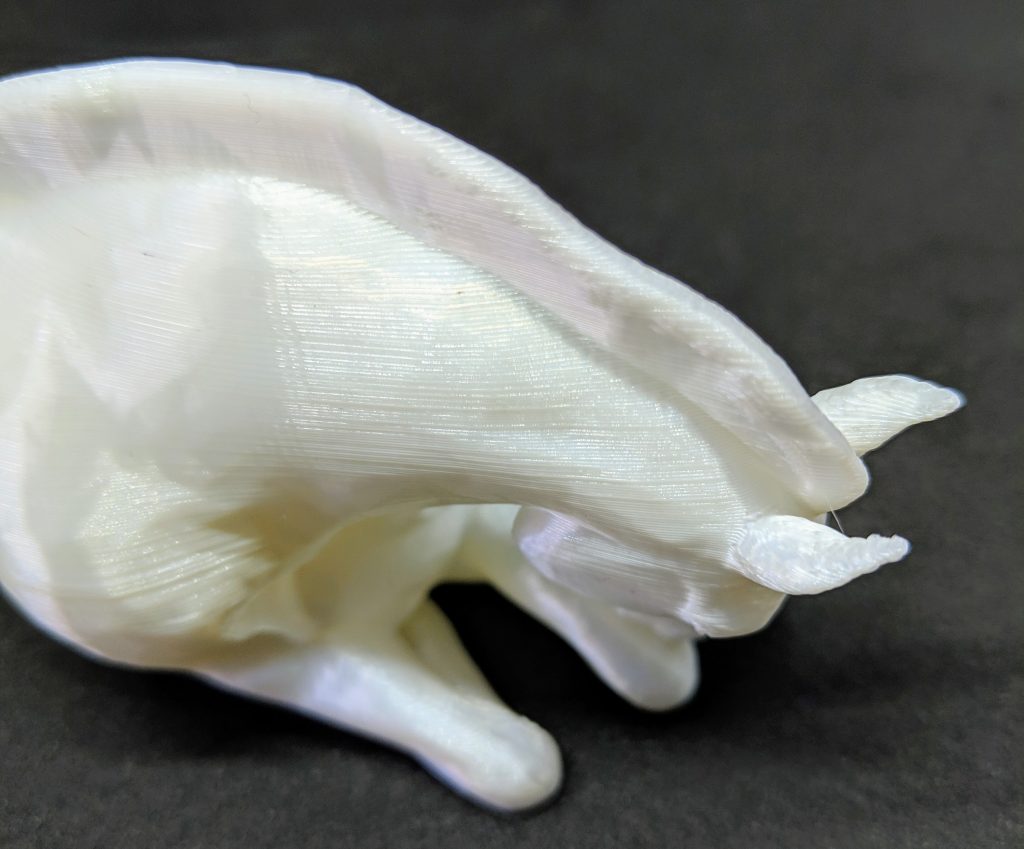
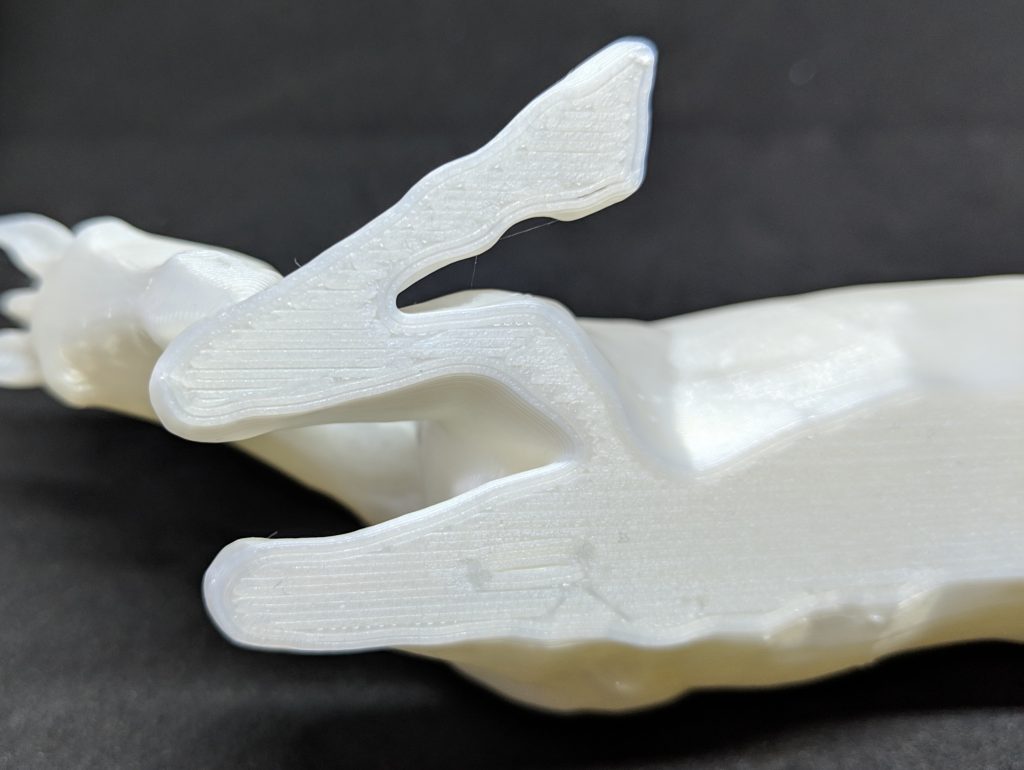
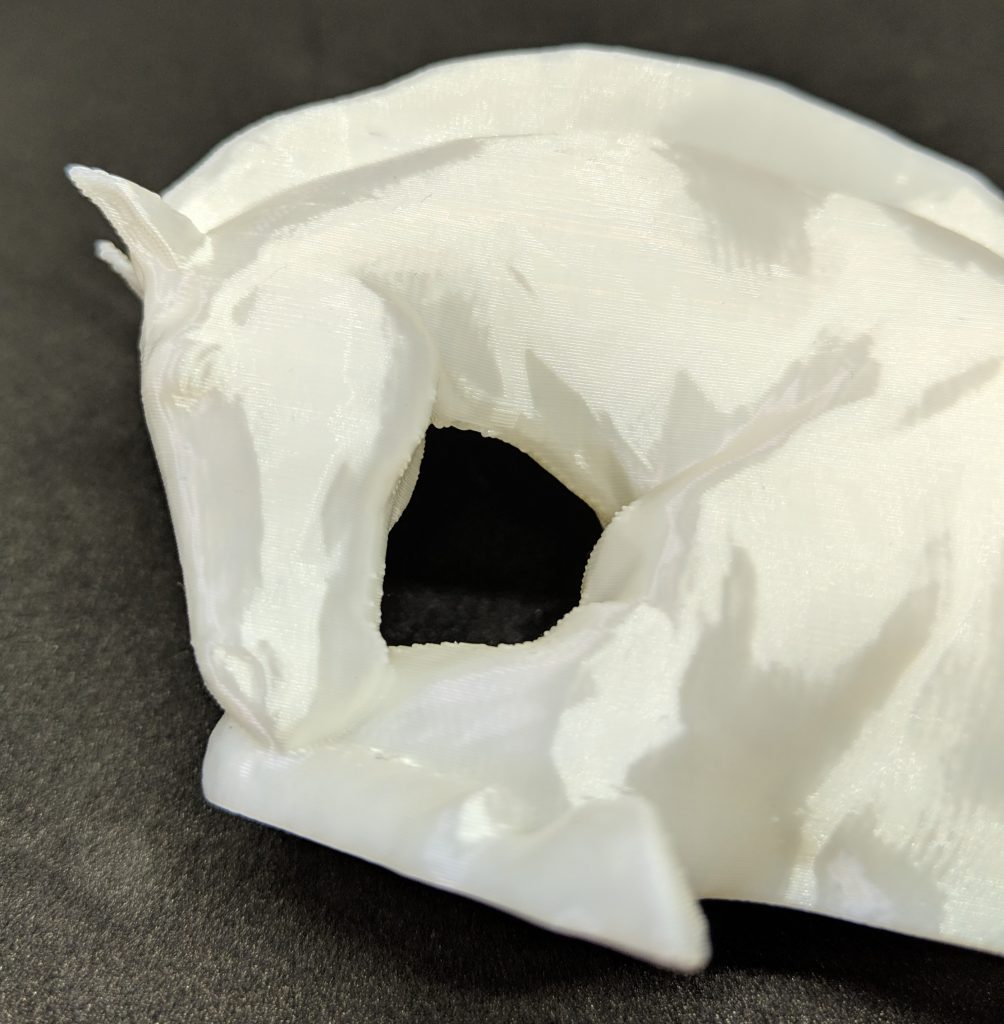
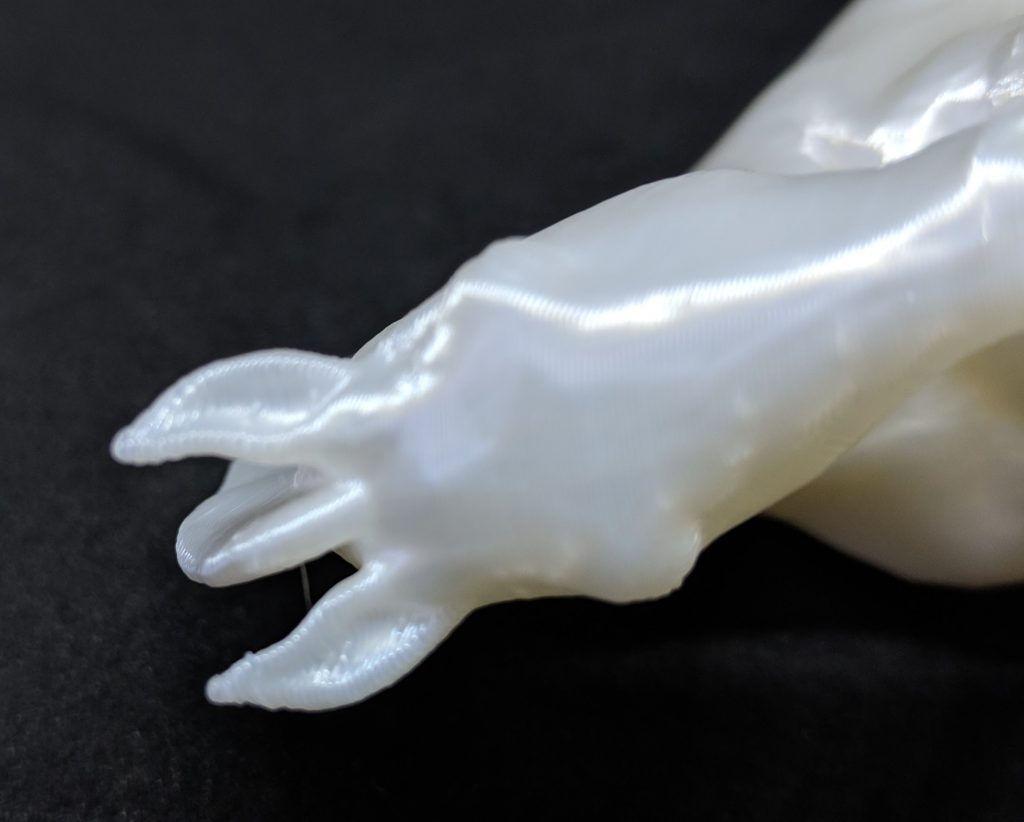
I can honestly say I was, and still am, stunned at how good this model is. Given that I’d pretty much had a “set and hope” attitude to the settings, that this is at a 200 micron layer height (which I’d consider “medium quality” at best) and that it’s a fairly challenging print, it’s simply awesome. This image above is the model still attached to the bed, I’ve not touched it in any way. There’s one tiny string between the ears, which you really have to look close to see, and there are a handful of blobs round the model, but that’s it.
Here’s some more photos, none of which are good advertisements for my photography skills.