Setup
Turn the machine on at the switch on the side of the base and cover your ears. The CR10S-Pro has an appalling start-up “jingle” and in my case the volume was set to maximum. This problem was exacerbated by my menu being set to Chinese.
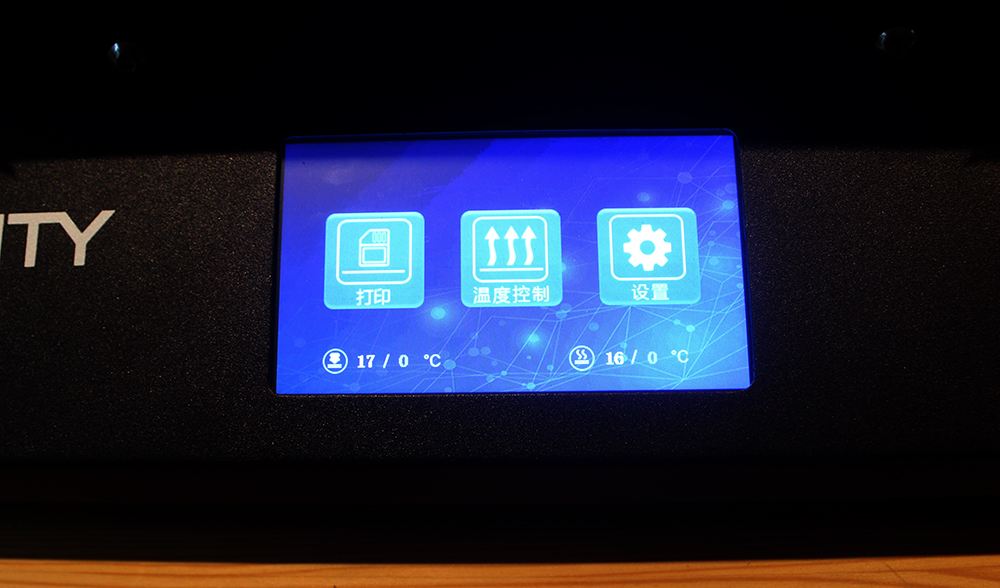
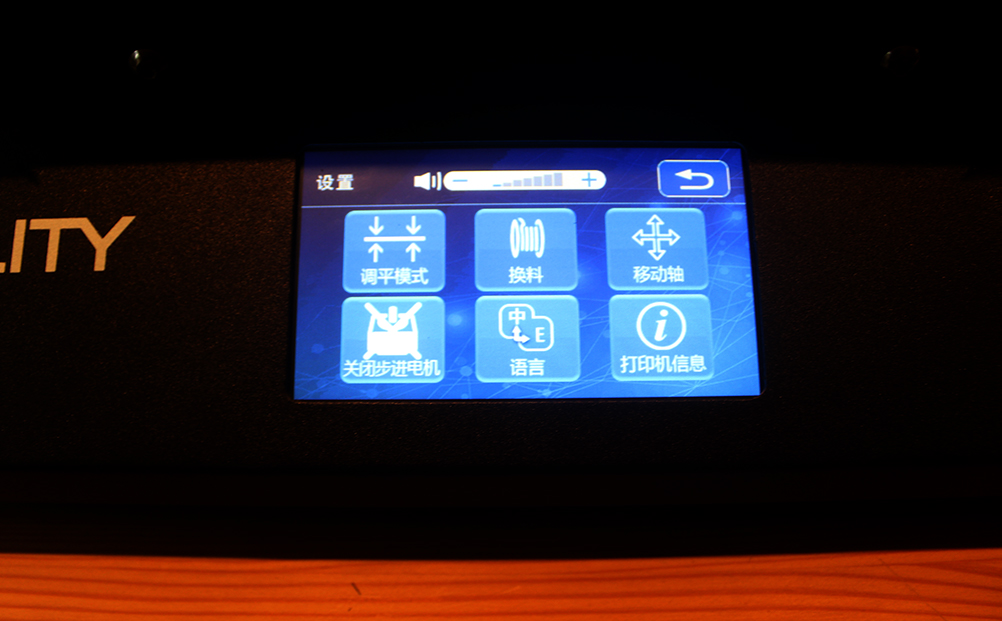
Fortunately, it’s easy to spot the Settings option (far right) and hitting this (it’s a touch screen, no stylus required) leads to this menu where the volume control is visible at the top of the screen and the language option is the middle button of the bottom row.
So with things a bit quieter and now in English, let’s proceed. The manual (which, by the way, has a useful chart showing all the menu options) says filament loading should be your next step, which seems odd given that this isn’t required for levelling, but hey ho. I was rather surprised to see there’s no automatic loading option, which seems common on even quite old/inexpensive FDM machines, so you’ll need to load the filament manually. First you need to preheat the head which you can do through the “Temp” option on the main screen (it’s the one in the middle on the first menu image above) either automatically which lets you choose PLA or ABS, or manually, which leads you to an easy to understand manual settings screen. The automatic option also preheats the bed, which seemed unnecessary for just the filament loading part, so I went for the manual option, setting the head to 200C to load the PLA reel they’d provided.
I found it rather odd that ABS was an automatic option, given that the CR10S-Pro is an “open” printer and ABS really likes an enclosure and preferably one that’s heated.
Once the head is heated you need to feed the filament down into the side of the run-out detector and here I hit a problem. I pushed the filament into the hole on one side and it just hit a block. I tried harder and it wouldn’t budge, simply wouldn’t go through to the other side. Trial and error revealed that this filament detector really likes your filament to be dead straight which, of course, off a small reel it isn’t, it’s curved like a banana. So you’ll probably need to straighten the first 10cm or so of the filament for it to go through.
Now you’re up to the extruder gear and here you need to hold the gear “free” using the lever and feed the filament through until it (eventually) reaches the nozzle and begins to squirm out. It seems like miles need to be fed in and again I found myself wishing for an automatic option, especially as the spring on the extruded gear is really strong.
Interestingly, the manual suggests that you should do both the above steps in one single action – feeding the filament through the run-out detector and down the Bowden tube past the extruder gears. Good luck with that.
Once you’ve got the filament to the nozzle you can now start the fun of levelling the bed!
The manual shows levelling to consist of two parts, a manual version and one using their automatic levelling feature. The manual option should be familiar to anyone who’s levelled an FDM printer before and the manual does a reasonable job of walking you through the steps if you haven’t. Essentially you hit the “Level Mode” button in Settings, then click “Aux levelling” (this step is missed in the manual), then get a piece of paper and adjust the four large knobs beneath each corner of the bed as you move the head around using the position buttons shown on the screen. This worked fairly well for me.
NB I warmed the bed slightly before levelling, just to 50C, just so it wasn’t ice cold and shrunken, like everything else in the kitchen.
The second part is the automatic levelling and ironically this is much more complex than the manual option. Worse, the manual doesn’t give any hints on how the two options are related. Do you need to do the manual levelling before the automatic levelling (I would guess so as a “gross” adjustment)? Do you need to do the automatic levelling at all if you’re happy with the manual results? Possibly not, but this is a large bed, and the automatic option measures 16 points, not just the four corners and centre of the manual version.
To automatic
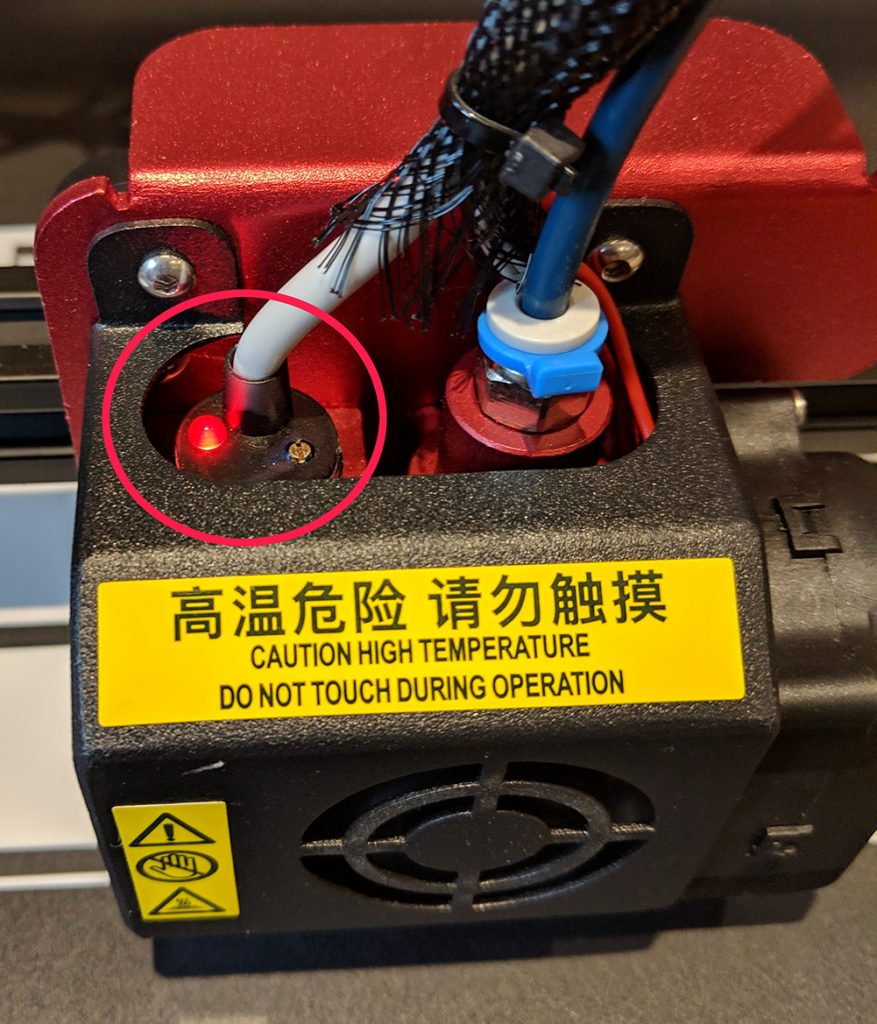
When you’re happy with the height, the manual says you need to turn the auto-level sensor clockwise or anti-clockwise to raise or lower it so that the light on top just illuminates. This had me stumped as there’s no clear way to turn the sensor itself, but luckily I soon realised they mean to turn the small screw on top of the sensor body.
Once you’ve got this firing as well as you can, you then hit the “Z Home” button, then what on my screen says “Measure levels” and the machine will go off on its own and do the auto-levelling and when it’s done, so are you and in theory you’re ready to print!